CAP Fab Labs · 3D Print Lab
3D Print Lab
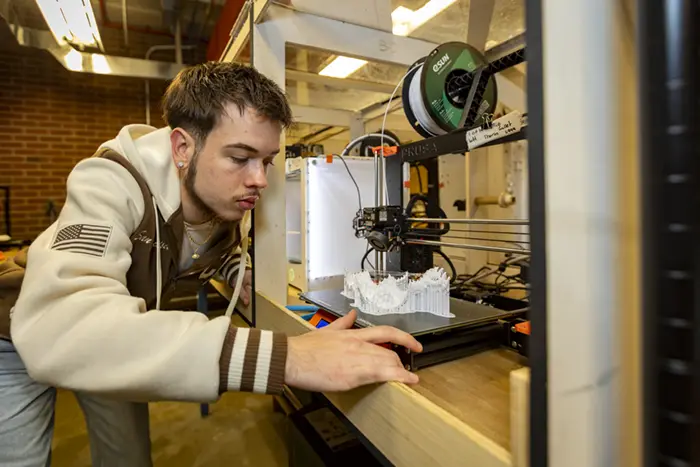
3D printing builds objects from a digital file, in an additive style, layer by layer. At CAP, the workhorse is FDM printing: plastic filament, strong parts, larger build volumes. CAP offers 3D printing to students, faculty, and staff at the cost of materials, subsidizing the cost of hardware by the CAP Dean’s Office.
What we print
FDM — the standard process at CAP
FDM (Fused Deposition Modeling)
All standard print requestsBest for: larger parts, prototypes, enclosures, functional parts, quick turnaround, budget-friendly.
Material: PLA filament — $0.03–0.05/g.
Build volume: up to 350×350×350 mm.
Layer lines are visible; strong and durable.
Questions about your project? Stop by AB 005 or email capfablab@bsu.edu.
On This Page
Jump to a Section
| 00FDM — What We Print→ |
| 01First Time? Start Here→ |
| 02How to 3D Print at CAP→ |
| 03The Hard Rules→ |
| 04Preparing Your Print→ |
| 05Policies & Procedures→ |
| 06SLA / Resin Printing→ |
First Time?
Complete the Training First
Students who have never 3D printed at CAP are encouraged to complete Module 3 before submitting a request, it introduces the technology and what your geometry needs to be print-ready. A class intro session led by qualified faculty or discussing with a CAP FabLab staff counts as your required consultation. You’re also more than welcome to walk into the printing lab and knock when a worker is in, we’re happy to help.
The Process
How to 3D Print at CAP
- Read UpGet familiar with CAP’s printers and materials, and review the print request checklist below.
- First Time? Complete Module 3If you haven’t printed before, meet with a Printer Fab staff member and or complete the 3D print training (Red Box Above). You do not need to show staff your module and file for Module 3, the goal is to show you what we see on our end.
- Prepare Your GeometryEnsure your model is Water-Tight, and contains no major and open edges. When using a printing slicer, and trying to generate the gcode, if an open wall is detected, the slicer will not generate that wall, potentially creating a broken model.
- Use the Rhino FileUse the Rhino File Template file, import your model, and scale it to a printer bed. After Select it and Follow these steps. File -> Export Selected -> Export in .stl
- Submit a RequestSubmit a 3D print request online. You’ll get a confirmation email, and staff will follow up to schedule your print and discuss pickup.
Little to No Exceptions
The Hard Rules
- We do not print objects that will take over 24 hours to print.
- We do not print objects that take over 1 kg of filament.
- Request your print at least five business days ahead to be guaranteed a finished print; a 24-hour print physically can’t be done when the request came in the night before.
- Mass requests (e.g., eight objects at 24 hours each) may be asked to reduce overall size; reserving an entire printer for days on one request isn’t fair to the lab.
- Your print’s smallest wall must be at least 2.0 mm thick (FDM).
Preparing Your Print
Checklist & Guidelines
Print Request Checklist
Follow this checklist to get your files print-ready and avoid delays:
- Download the Rhino template file and use it to plan your print.
- Each Mesh/NURB object must fit within the build-plate dimensions.
- Each object must be watertight with no bad geometry.
- Export in millimeter units to STL.
- Any closed geometry larger than 2 sq in must be a separate STL file.
- Closed geometries under 2 sq in can be exported as a group, if all objects are aligned to Z-Zero.
- For duplicate prints, build a plate from the template and export the duplicates as one STL (all aligned to Z-Zero).
- Submit STL files only for printing. Submit 3DM only as a reference/build-plate diagram, with dimension lines or annotations confirming scale and units. Only submitted STLs are printed.
- Include the filament size and color in each STL file name.
- Prints run with brims, supports, and 20% infill by default unless you specify alternatives in the request notes.
Modeling Guidelines
Water Tightness
Keep your volumes closed — airtight/watertight. This essentially means there are no major and large open sides in your model/mesh. The printers decide what to print from the boundaries of your geometry; even the smallest opening leaves the software unsure how to fill the gap.
Unified Normals
Surface normals must be consistent and point outward. In a closed volume it’s clear which side faces out, but software can get confused.
Scaling for Printing
Unsure if your model is scaled for a machine? Use the Rhino 3D Print Template, which includes each printer’s build volume as a wireframe box. Paste your geometry in to convert it to millimeters and fit it to one or more printers.
FDM Printers & Materials
FDM (Fused Deposition Modeling) prints melted plastic filament, line by line, layer by layer — best for larger models, prototypes, cases, enclosures, and general-purpose parts. Budget-friendly and strong, with visible layer lines.
FDM Printers in the Lab
| Brand | Model | Qty | Build Volume (L×W×H) |
|---|---|---|---|
| Prusa | XL | 6 | 350 × 350 × 350 mm |
| Prusa | Core One | 3 | 240 × 210 × 260 mm |
| Prusa | MK4 | 3 | 240 × 200 × 210 mm |
| Prusa | i3 MK3S | 5 | 240 × 200 × 210 mm |
During finals and project deadlines the XLs often run 24 hours nonstop with queues behind them. Smaller prints come back fastest — if your print is fairly large, splitting it in half may get it back sooner.
Available Filament
| Brand | Diameter | Type | Stocked Colors | Cost/g |
|---|---|---|---|---|
| eSun | 1.75 mm | PLA | White, Gray, Silver, Black, Tan | $0.03 |
| Generic | 1.75 mm | PLA | Clear | $0.05 |
You may bring your own filament upon request — discuss it with a worker in the lab. A schedule is posted on the front door; refer to the hours of operation.
Estimating Print Cost
Pricing is roughly one-to-one with the filament we purchase: [filament price] × grams = cost. At $0.03/g, a 100-gram print is $3.00. Typical student requests run 200–500 grams, or $6–$15. You can also submit a request and state clearly in the description that you’d like to see the price beforehand — and discuss with a lab worker for the most accurate cost.
Estimate It Yourself — PrusaSlicer
- Download PrusaSlicer. On setup, pick a printer from the fleet table above — use the 0.4 mm nozzle if asked.
- Choose generic PLA filament (this doesn’t matter much for cost).
- Drop in your .STL and confirm the size is appropriate.
- At the top of the screen set: Supports → Everywhere, Brim → On, Infill → 15%, Cubic.
- Click Slice and check the print looks right.
- Bottom right, read “Grams Used” and “Time to Print”, then: grams × cost of filament = total price.
Quicker Alternative — ViewSTL
- Drag your file into ViewSTL and read the volume in mm³.
- Volume × 0.0000372 = total price. Slightly less accurate — it excludes supports, so treat it as the bare-minimum cost.
Repair Tools
If your model has issues that seem impossible to fix, try:
- Autodesk Meshmixer — free software with analysis and repair tools.
- Microsoft 3D Model Repair — free online service; upload your model, let it process, download the repaired file.
Policies & Procedures
Rules & Guidelines
First-Time Users & Faculty
All users of CAP D-Fab services — students, faculty, and staff — are clients.
- First-time clients are required to complete Module 3, which covers available technologies and modeling requirements.
- Class projects with intro presentations by qualified faculty or CAP FabLab staff count as the required consultation.
- Faculty considering 3D printing for a class should contact the Lab Manager before assigning — to review build size, geometry limits, print duration, and whether the resulting request volume can be accommodated.
Submission & Review
Submit requests through the online request form, with your geometry attached at submission. Submit as far ahead of your due date as possible, and plan time for post-processing.
FDM Requests
- Specific printers and settings are accommodated where possible, but a print may move to a different machine without notice if the filament doesn’t change.
- Not all settings can be customized. Note the purpose behind a requested setting so staff can apply machine-specific knowledge.
Review
Staff review every request before queuing. Models may be returned or rejected for:
- Improperly scaled geometry (see build-size constraints)
- Bad geometry — open meshes, non-manifold edges
- Offensive or dangerous content (obscene objects, firearms, weapons)
- During crunch time, non-curricular content (toys, game pieces, action figures, household items)
Staff advise on fixing bad geometry but are not responsible for correcting it. Error-free geometry isn’t always printable — staff may suggest alternative approaches.
Turnaround, Queue & Crunch Time
Demand is tracked with a color code: Red = High, Yellow = Medium, Green = Low.
- Green: goal is to print within 2 business days of initial processing.
- Red: goal is within 7 business days.
- Initial processing happens at 11:00am on business days.
- Expect longer delays if best practices aren’t met. Repeatedly submitting bad geometry may require additional consultation before eligibility resumes.
Requests are processed in the order received, though newer/shorter jobs or size/filament constraints may reorder the queue. CAP reserves the right to deny non-CAP-affiliated requests to manage resources in service of CAP-affiliated clients.
Crunch Time (last 4 weeks of a semester)
- No prints estimated over 24 hours are accepted.
- Limited to a single printer of a given type at a time while others are waiting.
- Total simultaneous print time across machines may not exceed 24 hours.
Long Prints (outside crunch)
Long Prints are allowed (over 24 hours) upon given permission. These exceptions will only be permitted outside of crunch time.
Needed-By Dates
Our staff work incredibly hard, and do their best to accommodate but can’t guarantee dates, given print duration, equipment availability. With our resources, it is best to ask staff for updates, we cannot always reach out.
Costs & Billing
- Clients pay only for the materials consumed — charges are based on material-consumption estimates generated by printer-specific software. FDM cost is calculated per gram of filament.
- You’re responsible for the cost whether or not you pick up the print.
- Cancel after a print starts → charged for material consumed, by percentage completed.
- Student charges are billed to bursar accounts at the end of each semester; the Lab Manager can provide your balance.
- Faculty provide a department/project BSU account number, or pay by check to Ball State University.
- A 25% surcharge applies to clients not affiliated with CAP.
Print Failure & Cancellation
3D printing is complex and prone to failure. Staff communicate potential issues before starting when they can, but not all failures are predictable.
- By requesting a print, you assume the risk of failure — cost and time — for failures due to client error not reasonably detectable by staff.
- If a print fails for a non-geometry reason, it’s restarted — unless it won’t finish by your needed-by date, in which case you’re notified first.
Pickup & Unclaimed Prints
Staff logs when a print has been claimed to have started, requests are not always emailed to your inbox, please stop by the lab to see how your order is doing.
- Standard pickup: come to the 3D Printer Lab (AB 005) during standard pickup times after your completion notice.
- Prints that have been left in the crc will be tossed after 1 month if they are left for an extended amount of time (you’re still charged).
Safety & Post-Processing
- Only Cap Staff and trained faculty may operate the printers or associated equipment.
- Please do not crowd the room, if there are over 3 students inside the lab, please wait outside the door till another student leaves.
- Absoluately no open flames, vapes or e-cig, or cigarettes in the lab.
Post-Processing FDM Prints
- Post-processing is your responsibility and at your own risk — wear eye protection, as small pieces can fly off.
- Staff do not remove brims and supports for students, but you’re welcome to use the lab’s tools reasonably.
Special Use
SLA / Resin Printing
SLA / Resin Printing
Our most precise offering to date. This offering is ideal for small, intricate geometry like miniatures, jewelry prototypes, and complex organic forms. Note: SLA is more expensive than FDM and requires post-processing.
SLA printing uses a light-cured liquid resin to produce smooth, highly detailed surfaces. Use it when FDM won't cut it for detail or surface quality, or for prints that needs to be incredibly small.
Formlabs Form 3+
| Brand | Model | Material | Build Volume (L×W×H) | Cost/mL |
|---|---|---|---|---|
| Formlabs | Form 3+ | Clear Resin | 132 × 132 × 180 mm | $0.15 |
| Formlabs | Form 3+ | White Resin | 132 × 132 × 180 mm | $0.15 |
- To request SLA, select FDM on the print request and note in the description that you are requesting SLA resin printing: clear or white.
- Minimum wall thickness: 0.8 mm
- Not suitable for large prints — build volume is much smaller than FDM
- Requires post-processing (wash + cure) — allow extra time