Step 01
Before You Begin
The Lab Manager is Judy Kreiger (jlkreiger@bsu.edu).
-
Have the Room Monitor Assist YouHave the Laser Room Monitor assist you the first few times you use the laser cutters and any time you have questions.
-
Note the Bed SizesThe lab has laser cutters with two different bed sizes: 1 x (18 inches x 24 inches) and 3 x (18 inches x 32 inches). Make note of this when planning your cut sheets. Each machine is labeled with its model number and bed size, which is also the name you will look for under Destination when you print.
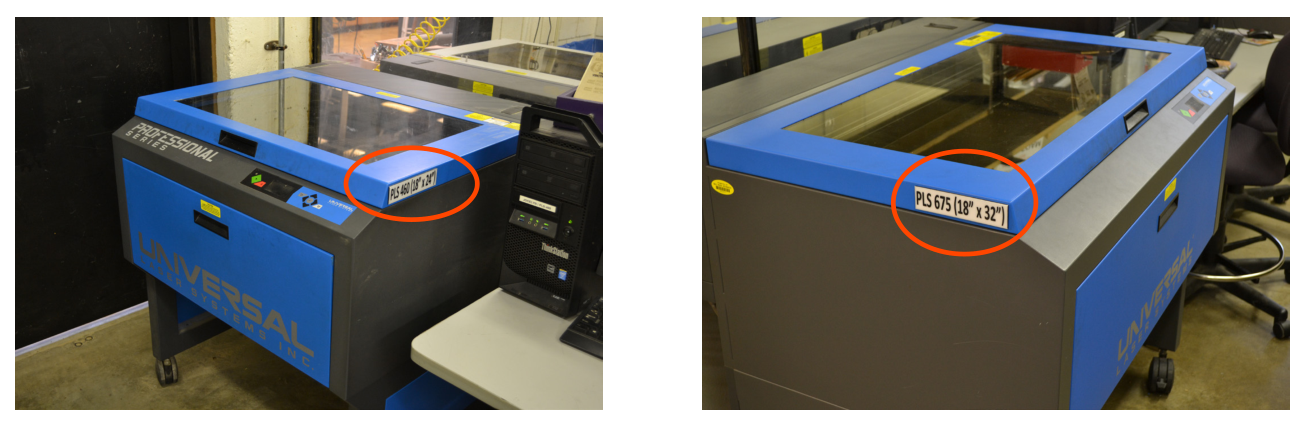 Figure 1: The lab has laser cutters with two different bed sizes.
Step 02
Set Your Units to Inches
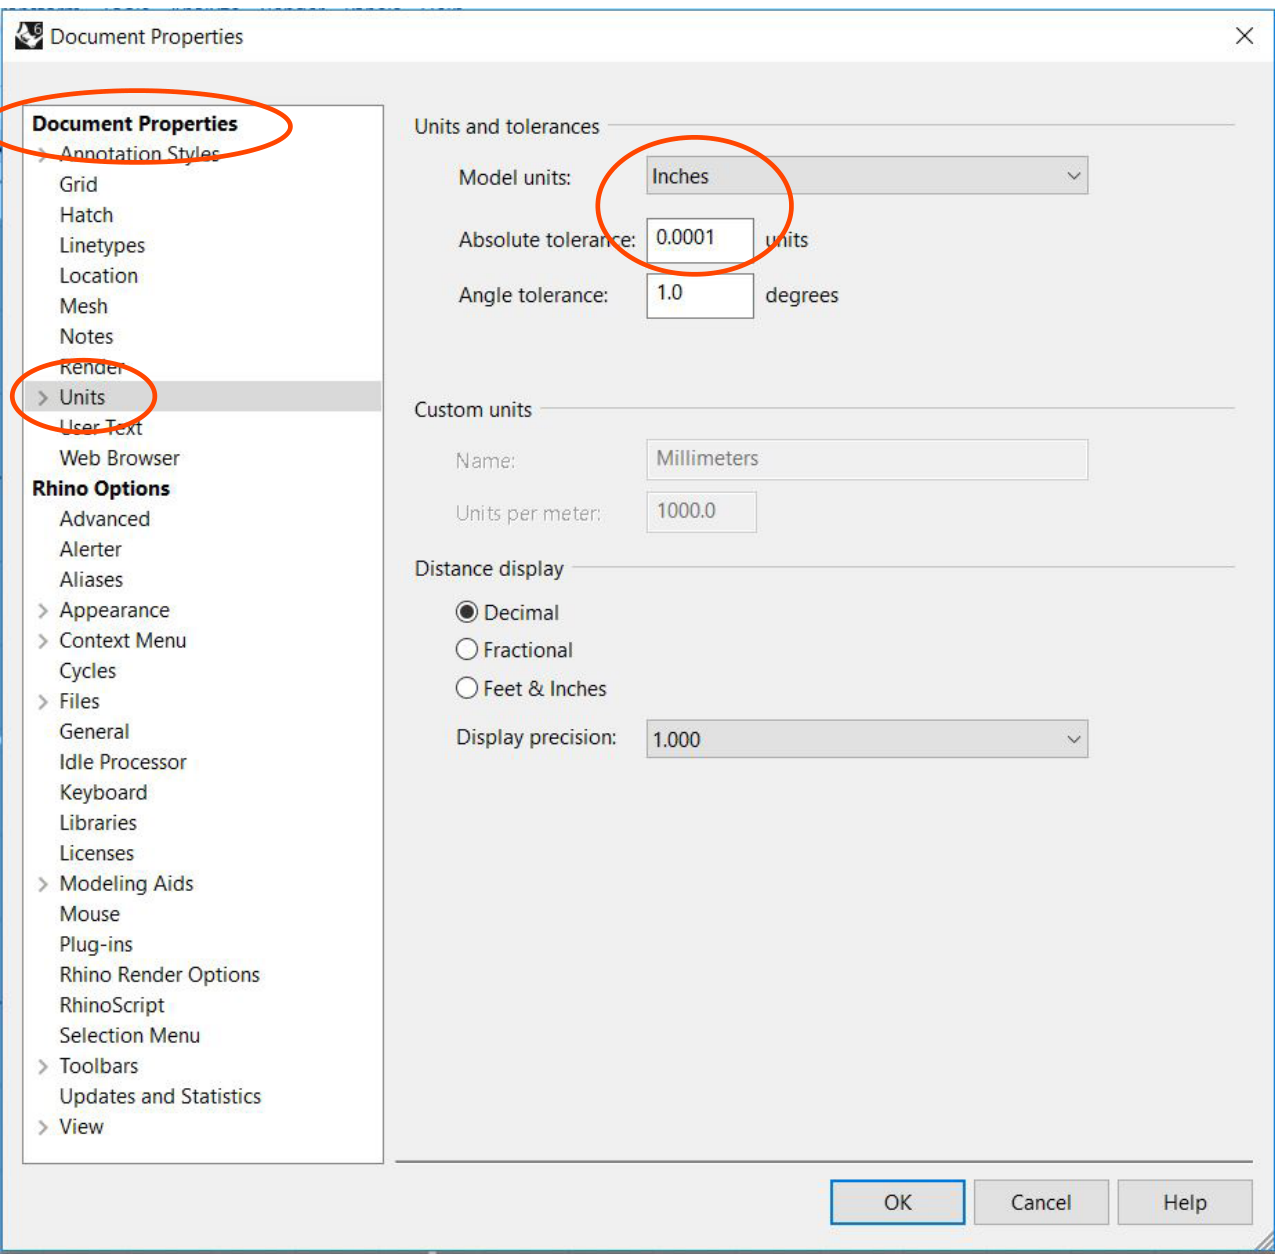
Make sure your units are INCHES in Rhino. Use the command “Units” to verify. The template and the machine beds are both dimensioned in inches, so a file set to millimeters will come out at the wrong size.
Step 03
Layer Colors & Line Weights
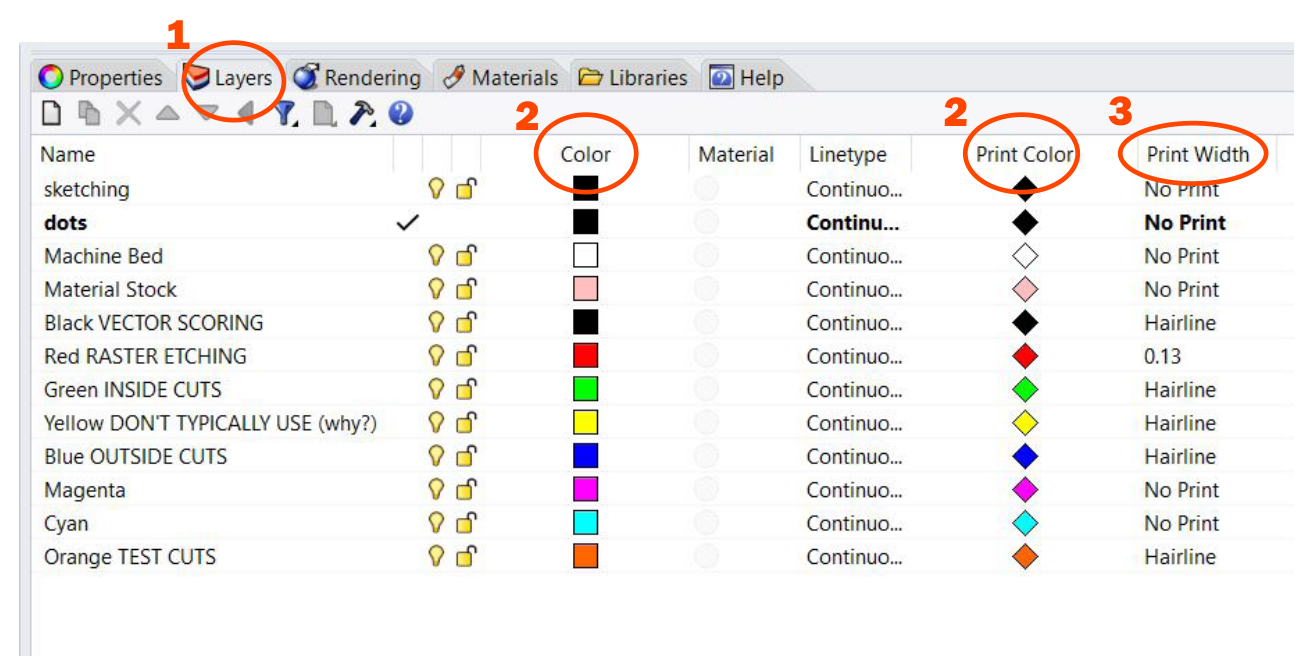
Make sure your LAYER COLORS and LINE WEIGHTS are correct. The laser cutter reads the layer color to decide which cut setting to apply, and the print width to decide whether the layer cuts at all.
-
Set the Layer ColorsLayer colors need to be a specific RGB for the laser cutter to read them.
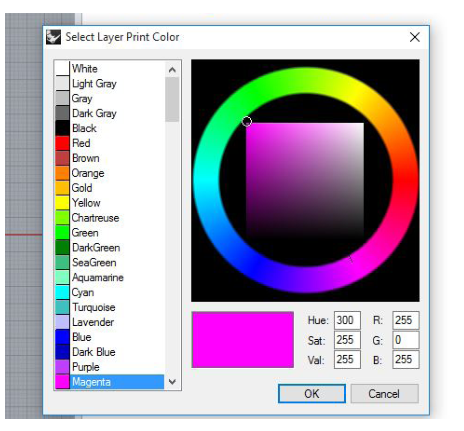 Figure 4: Select Layer Print Color.
 -
Set the Print WidthDouble-click on the “Print Width” column. The layer must be set to “Hairline” for vector cuts or scores. “No Print” allows you to leave useful layers on, such as “Machine Bed”, without them cutting.
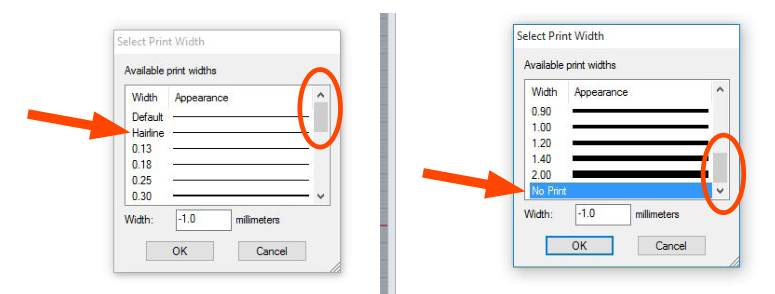 Figure 5: Double-click on the “Print Width” column to set Hairline or No Print.
Required Layer RGB Values
| Layer | Red | Green | Blue |
|---|---|---|---|
| Black | 0 | 0 | 0 |
| Red | 255 | 0 | 0 |
| Green | 0 | 255 | 0 |
| Yellow | 255 | 255 | 0 |
| Blue | 0 | 0 | 255 |
| Magenta | 255 | 0 | 255 |
| Cyan | 0 | 255 | 255 |
| Orange | 255 | 102 | 0 |
Step 04
Print Setup & Destination
In the laser cutting lab: make sure the station computer is connected to the laser cutter and both are on. Load your file onto this computer.
-
Open the Print Setup Window“Print” will open the Print Setup window.
-
Set the DestinationMake sure “Destination” is set to the laser cutter. Typically it is named “PLS” + a number.
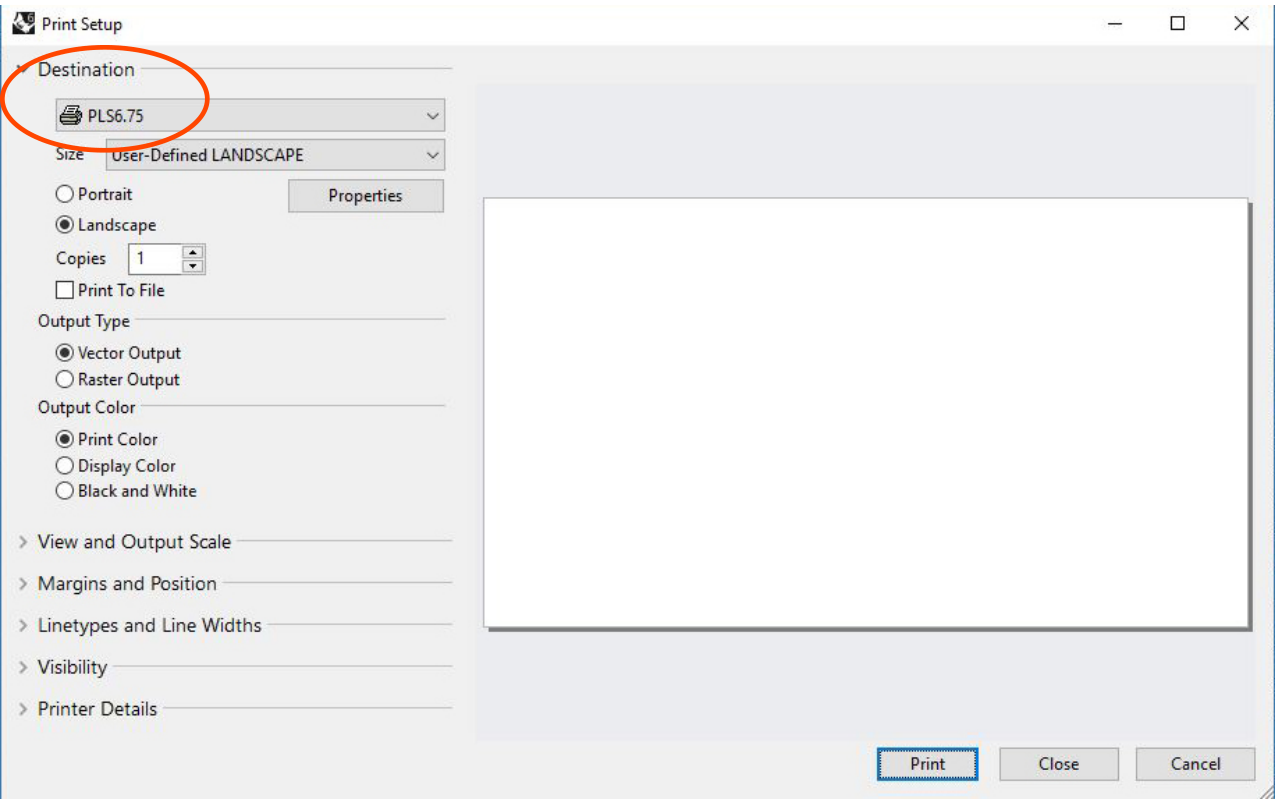 Figure 6: Make sure “Destination” is set to the laser cutter.
Step 05
Setting Your Scale
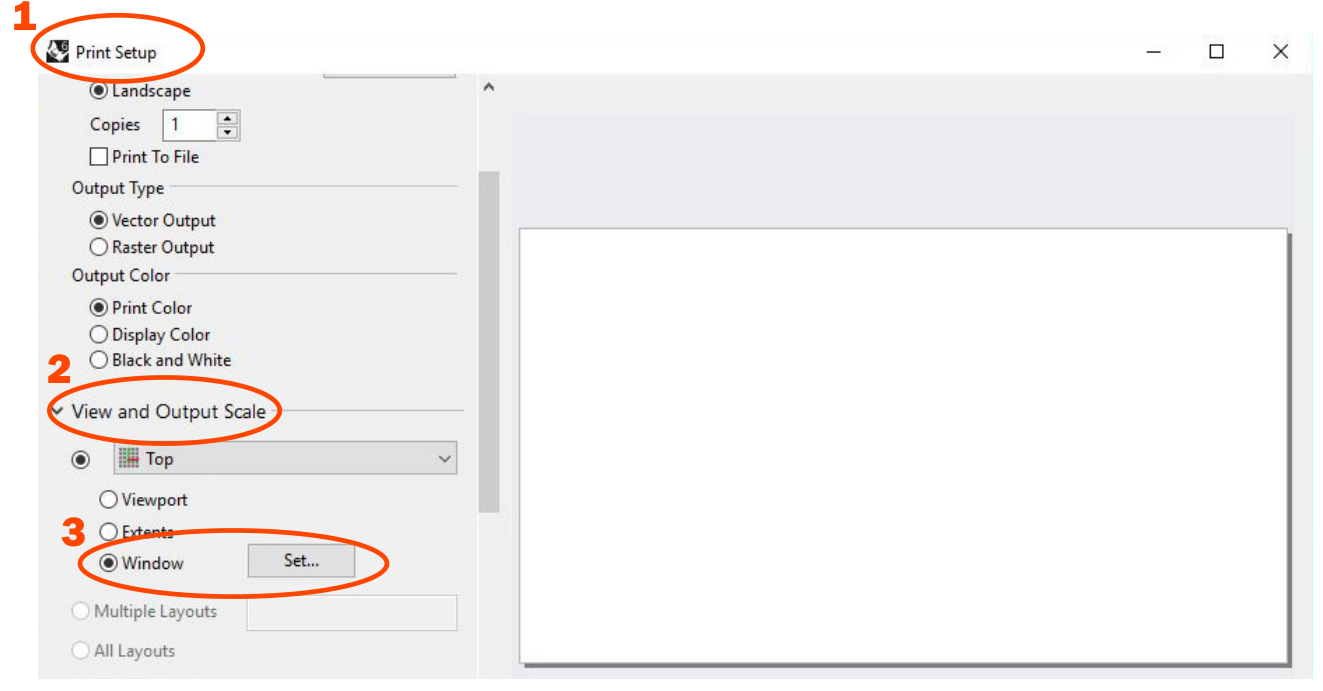
Make sure your SCALE is set correctly. In “View and Output Scale” use “Window > Set” to set your scale from the TOP view. The window you draw here is the area the laser maps onto its bed, so it has to match the machine you are cutting on.
-
Set the Print Window to the Machine BedUsing the “End Point Osnap” set the gray rectangle to either the 18 x 24 or the 18 x 32 Machine Bed. Depending on which laser cutter you are on, the gray rectangle will have different proportions. Hit “ENTER” when done.
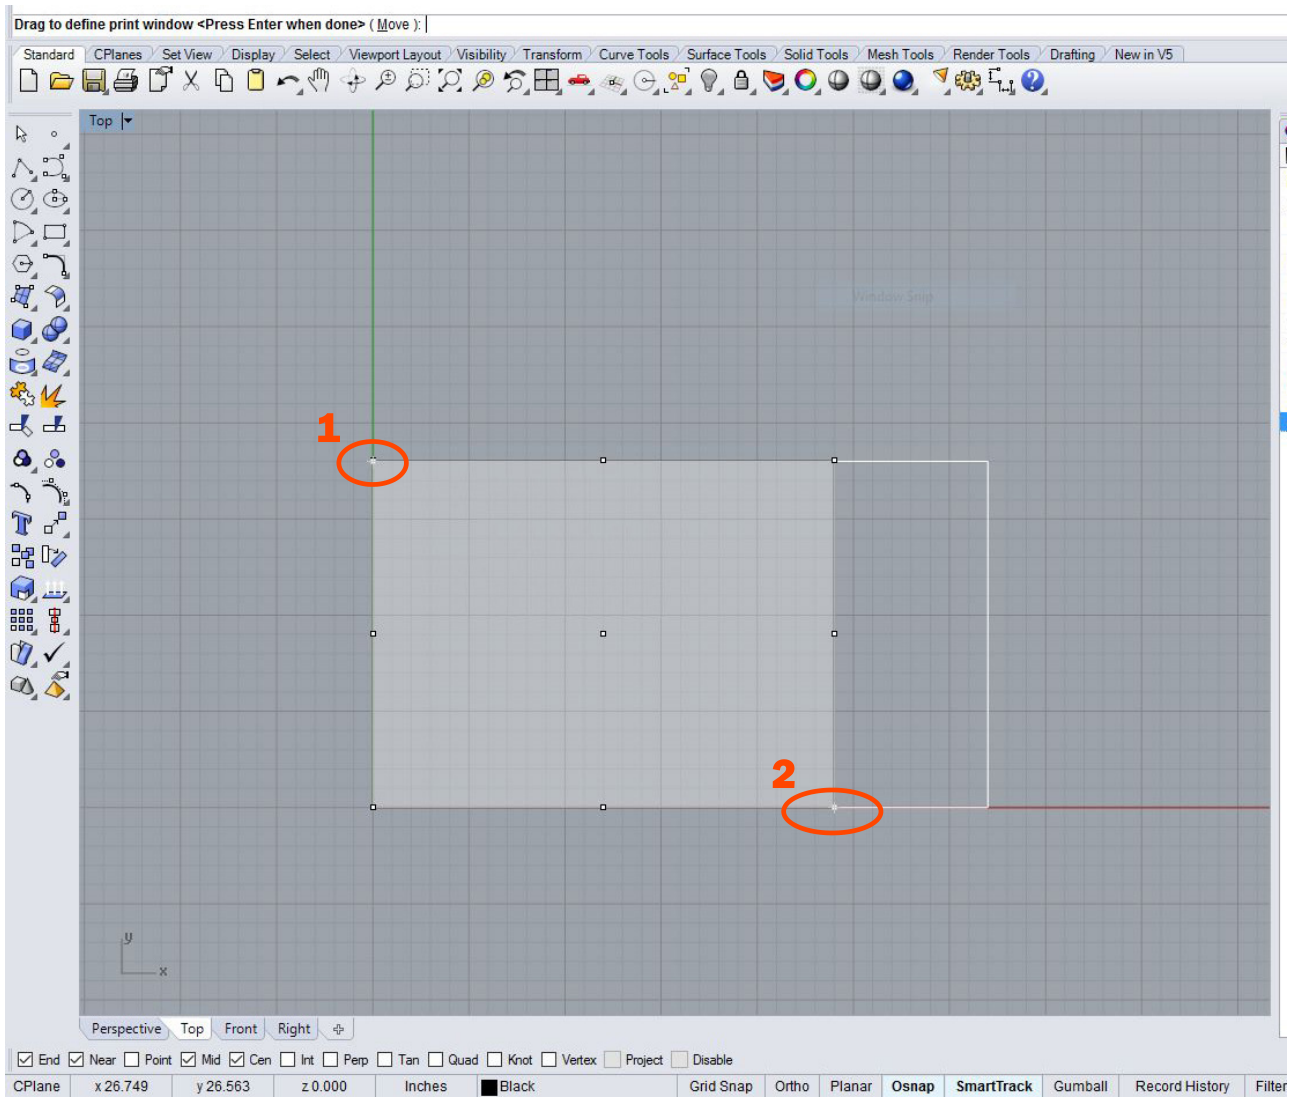 Figure 8: Set the gray rectangle to the Machine Bed using the End Point Osnap.
Step 06
Laser Properties
Make sure your LASER PROPERTIES are set correctly.
-
Click Properties“Properties” will open the standard laser window where you set: POWER, SPEED, and PPI.
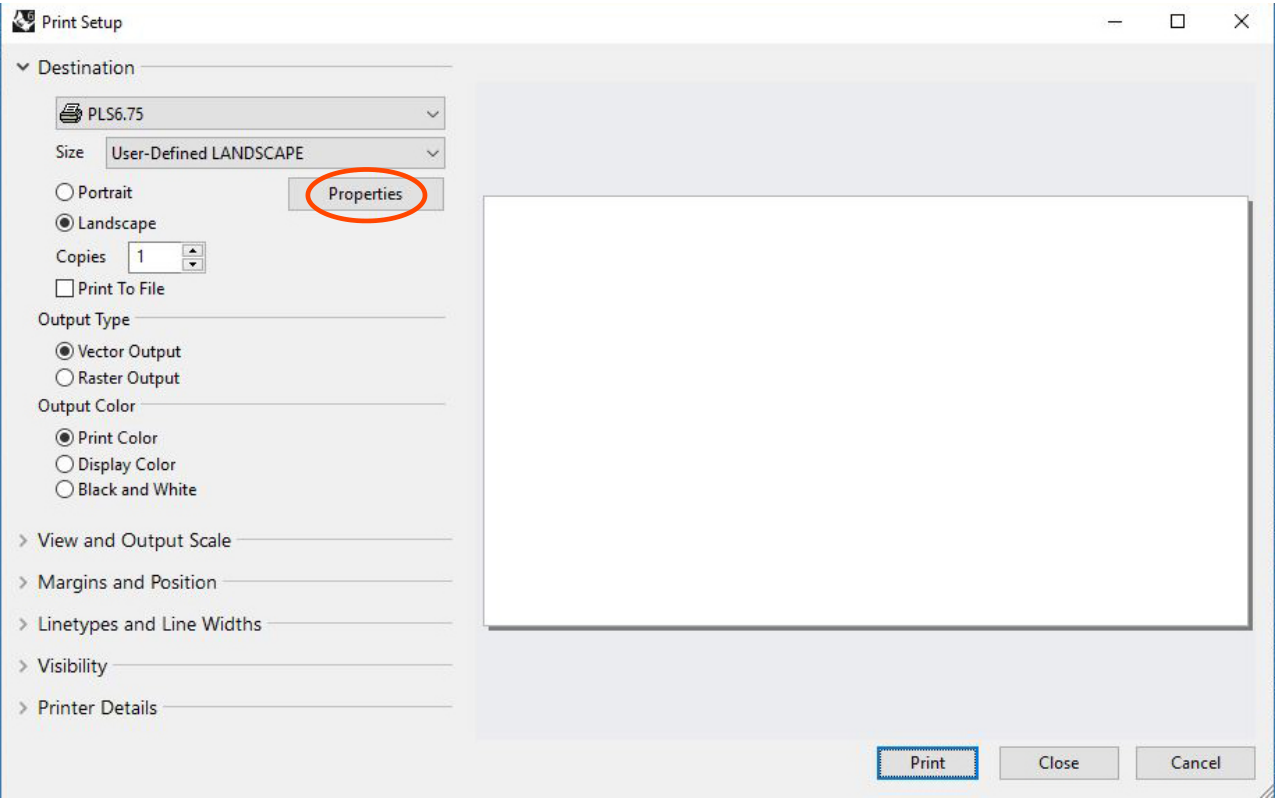 Figure 9: The Properties button in the Print Setup window.
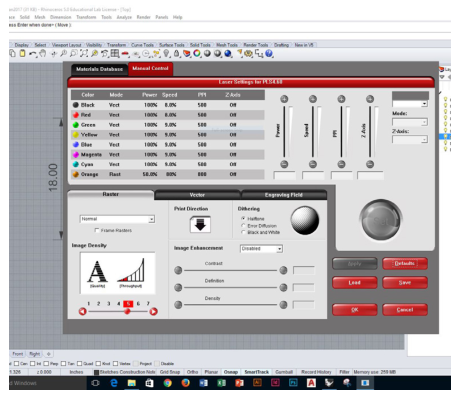 Figure 10: Properties opens the standard laser window.
 -
Set the Values for Each ColorThe laser window lists the same colors as your layers. Select the color you want to configure (1), set its Power, Speed and PPI (2), and set the Mode (3). Vect is the typical setting for vector cuts and scores, Rast is used for raster etching, and Skip tells the laser to ignore that color entirely. Click the big Set button to save your changes (4). Any color you are not cutting should be set to Skip.
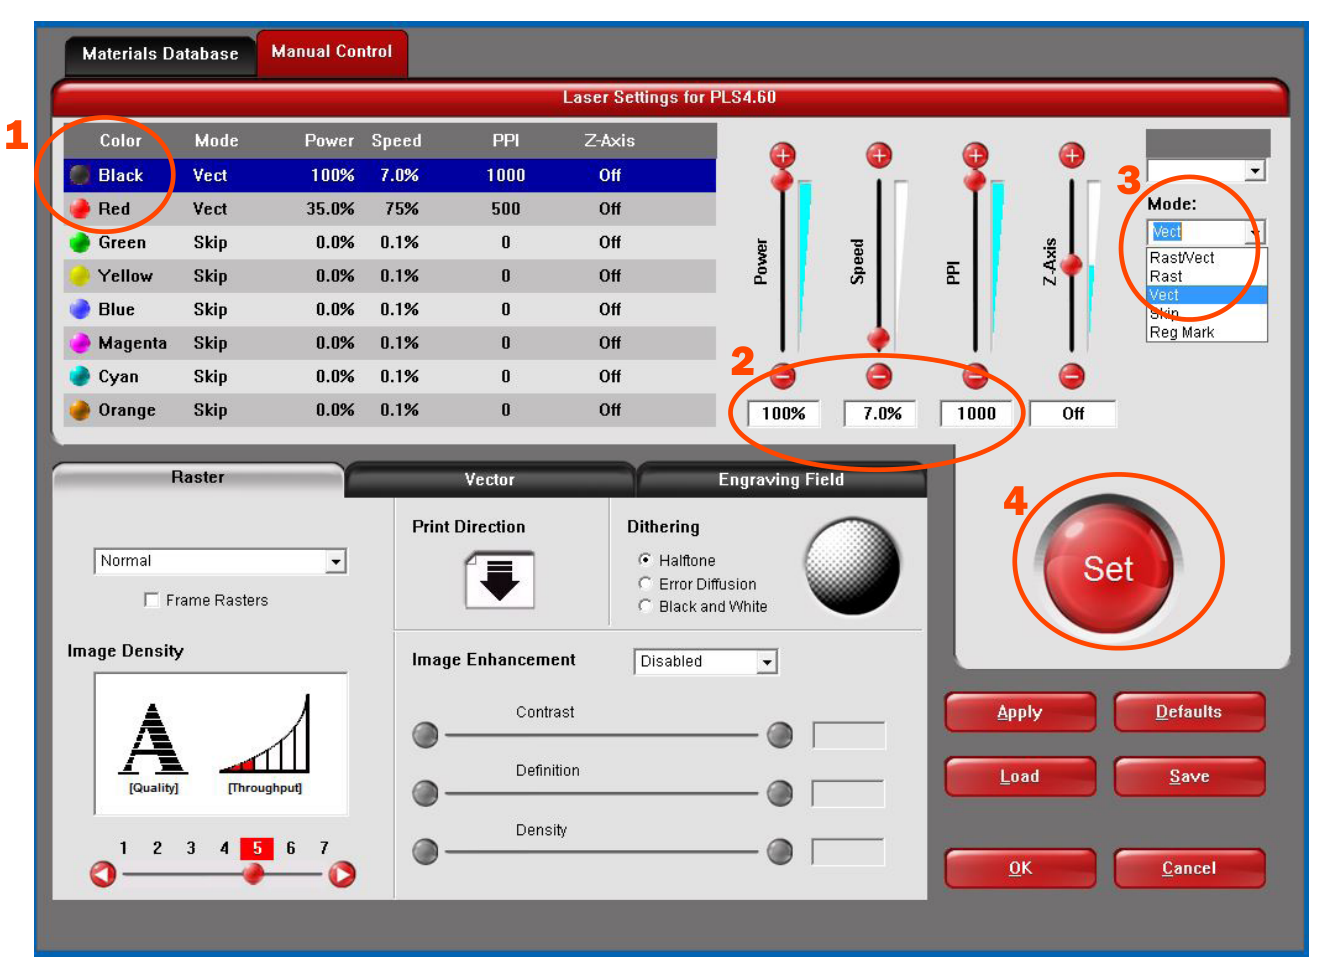 Figure 11: Select the color, set POWER, SPEED, PPI and Mode, then click Set.
 -
Get the Settings From the Index CardsIndex cards located at each machine will give you guidelines for that machine and the operation you want to perform. POWER, SPEED, and PPI.
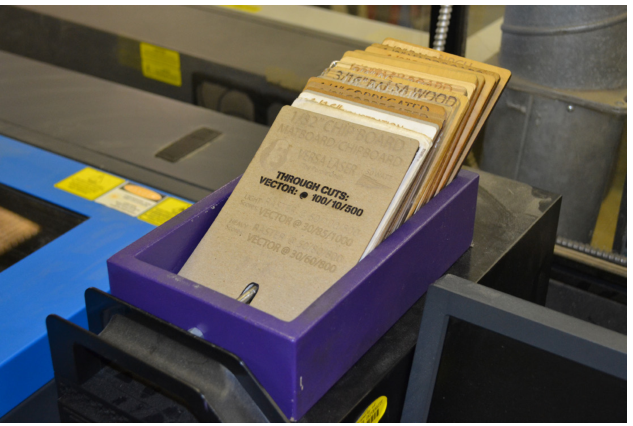 Figure 12: Index cards are located at each machine.
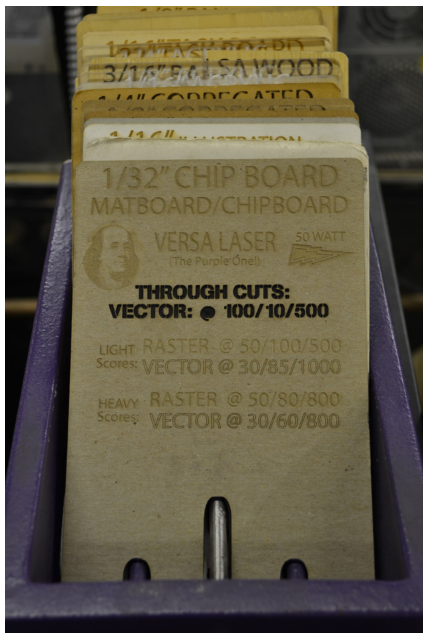 Figure 13: A card giving guidelines for that machine and operation.
Step 07
Output Type & Sending the File
-
Check the Output Type“Output Type” can affect whether the laser cutter will recognize geometry and/or whether it will distort a raster image. It is typically set to “vector.”
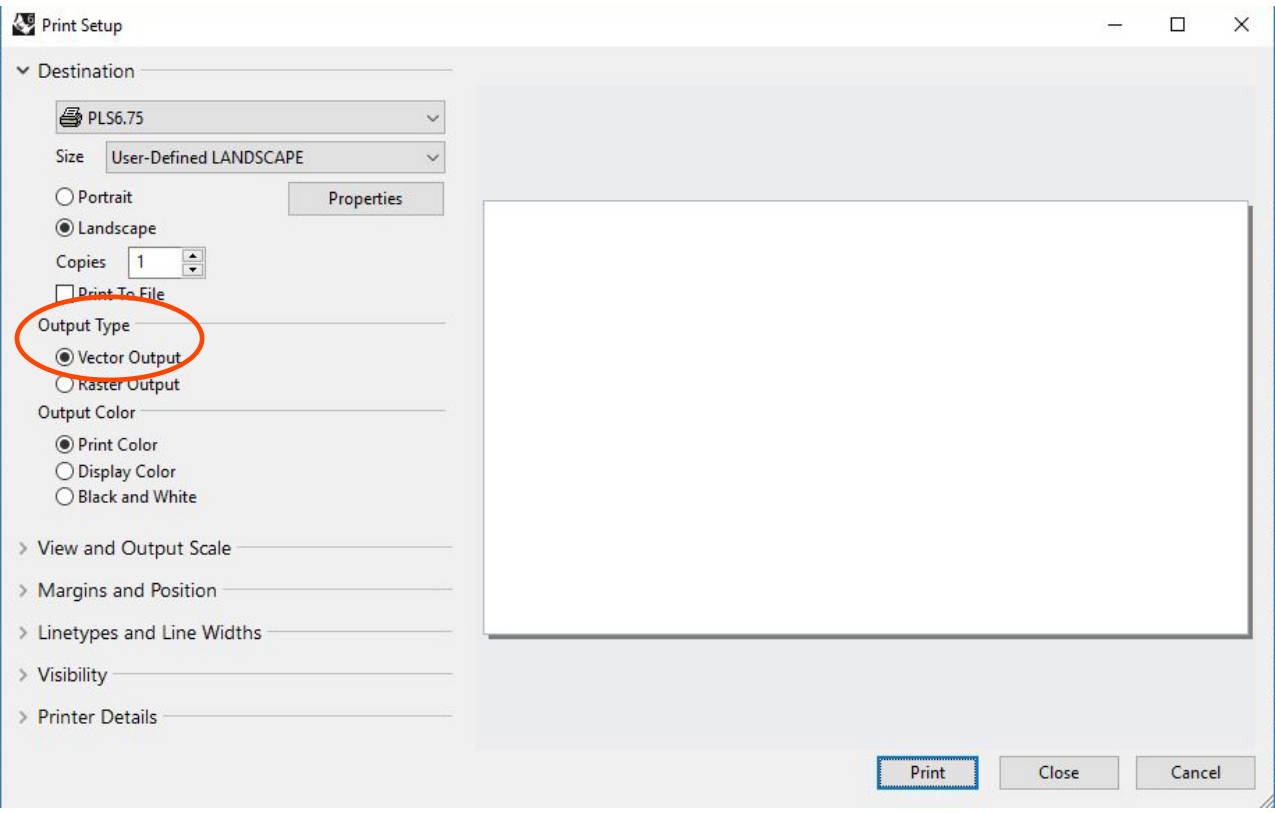 Figure 14: Output Type is typically set to Vector Output.
 -
Send the FileSelect “Print” to send the file to the laser cutter.
-
Confirm It ArrivedAfter a few seconds, you should see your filename on the screen on the control panel of the laser cutter in a format like “301 OF 301 MY CLASS PROJECT.” If you do not, ask a staff member for help.
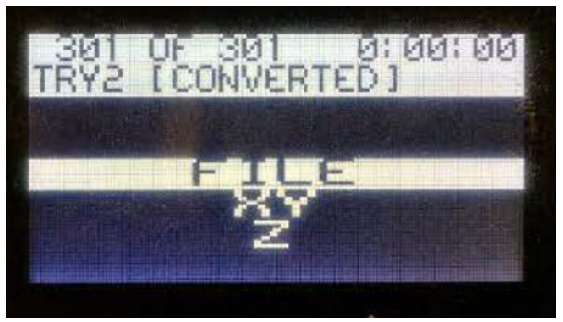 Figure 15: The filename appears on the control panel screen of the laser cutter.
Step 08
At the Laser Cutter
Load your material, open the Control Panel, and focus the machine before you run the file. Please ensure any ventilation systems that your system supports are on such as an exhaust fan or hood vent.
-
Load Your MaterialOpen the lid of the laser fully, making sure it does not drop when you let go of it, and place your material in the bed of the laser, making sure:That it lines up with the steel rulers on the top and left sides of the bed,That the height of your material will not interfere with the nose cone of the laser,That it does not hump up in the middle of the sheet or curl up sharply on the edges.Warning: All of these situations will cause the nose cone to catch on your material and ruin your work.
-
Open the Control PanelClick the Universal Laser Systems Control Panel icon in the lower right corner of the screen to open the Control Panel. The Control Panel displays a virtual view of the laser cutter bed and allows for calibration and cut control.
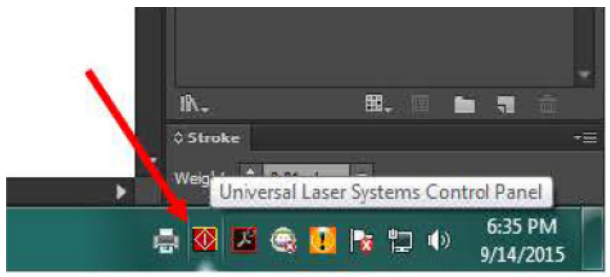 Figure 16: The Control Panel icon is in the lower right corner of the screen.
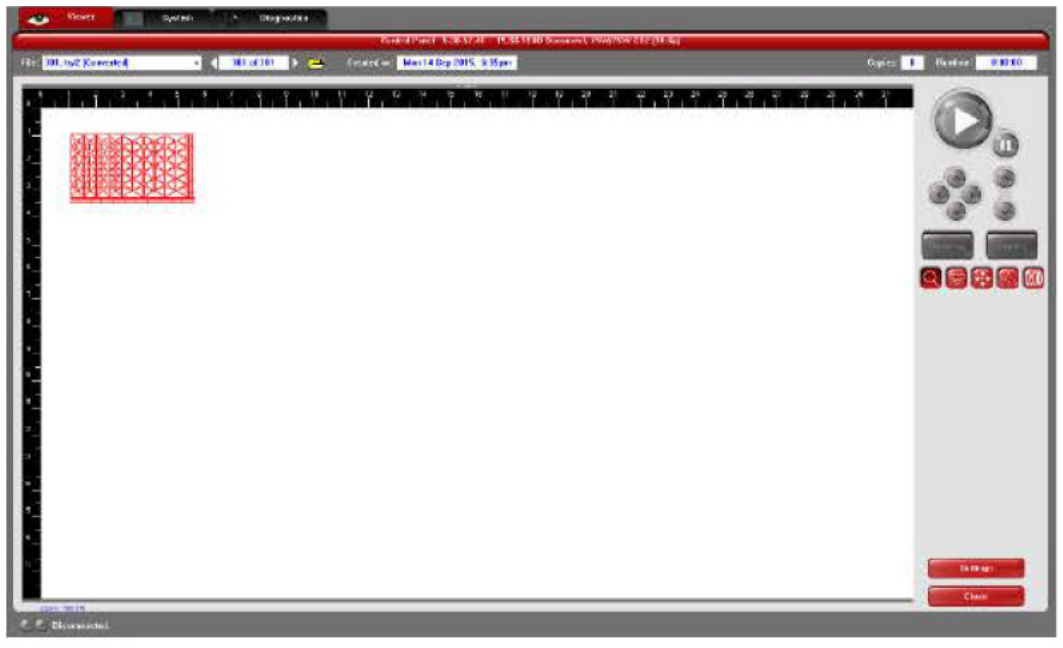 Figure 17: The Control Panel shows a virtual view of the bed and your file.
 -
Move the Focus CarriageClick the Focus icon on the right hand side of the screen, then click on a location over your material. The laser focus carriage will move toward the location you clicked.
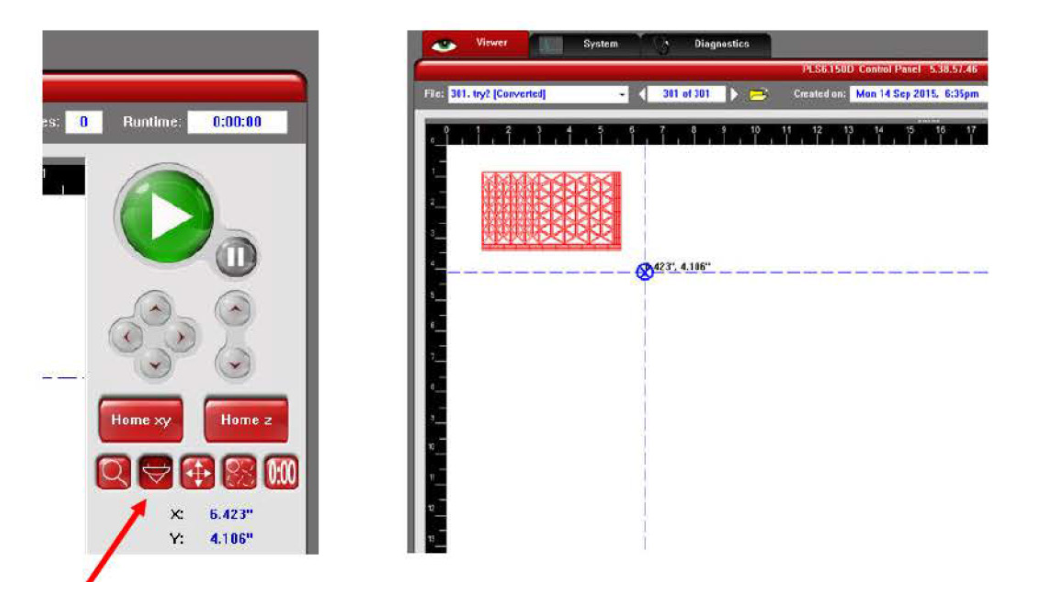 Figure 18: The Focus icon on the right hand side of the screen. Click a location over your material and the carriage moves to it.
 -
Find the Focus ToolFind the black and white plastic focus tool on the right-hand shelf inside the laser cutter.
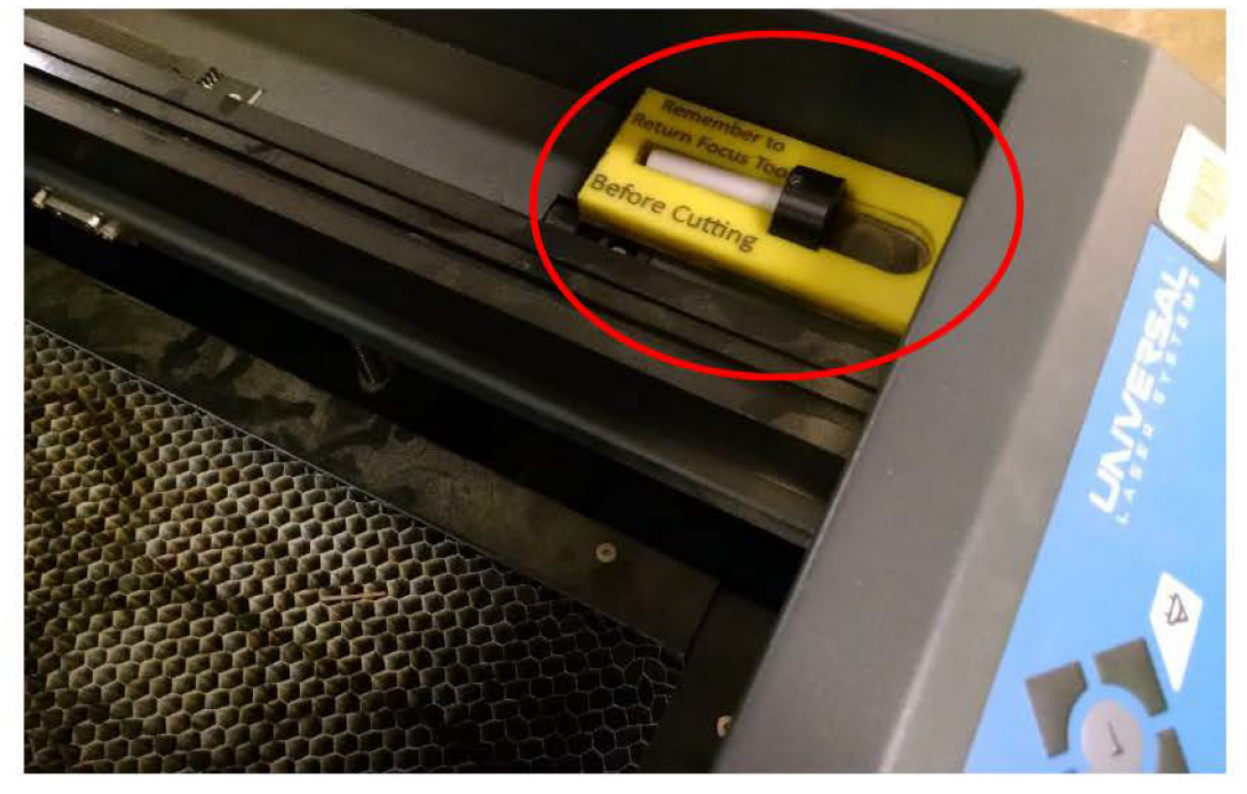 Figure 19: The focus tool lives on the right-hand shelf inside the laser cutter.
 -
Set the Focus Tool Against the CarriagePlace the focus tool on top of the material, near the laser focus carriage. Raise or lower the bed using the UP and DOWN buttons on the machine so that the notch at the top of the white part of the tool rests against the side of the focus carriage.
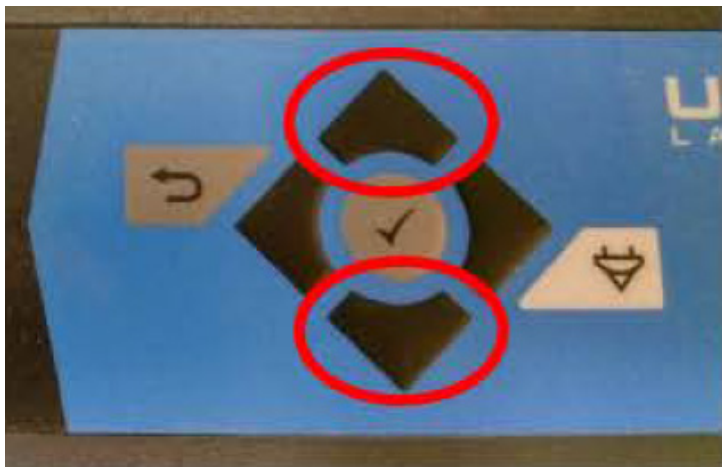 Figure 20: Raise and lower the bed with the UP and DOWN buttons on the machine.
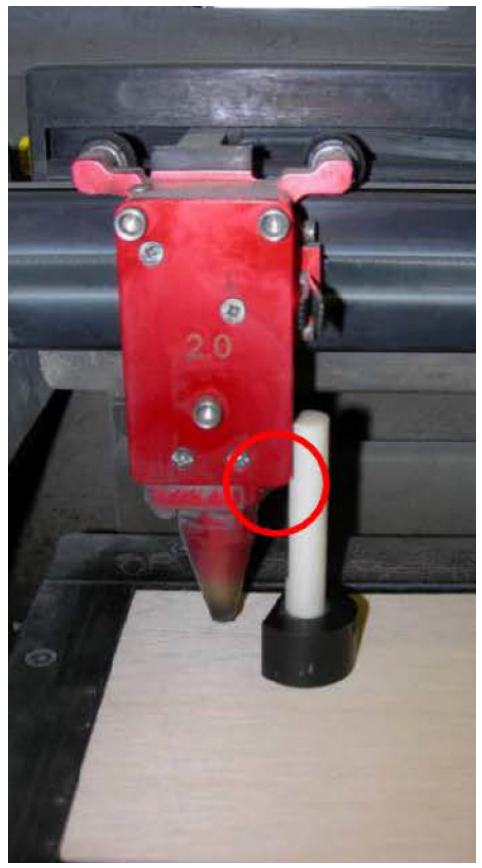 Figure 21: The notch at the top of the white part of the tool rests against the focus carriage.
 -
Fine Tune the FocusSlowly raise the bed until the beveled edge on the focus tool touches the bottom edge of the focus carriage and you see the top of the focus tool start to tilt away from the focus carriage. Move the bed back down slightly until the tool sits perfectly flush with the carriage.Pro Tip: Press the Select (checkmark) button on the machine to change move increment per press of the UP and DOWN buttons.
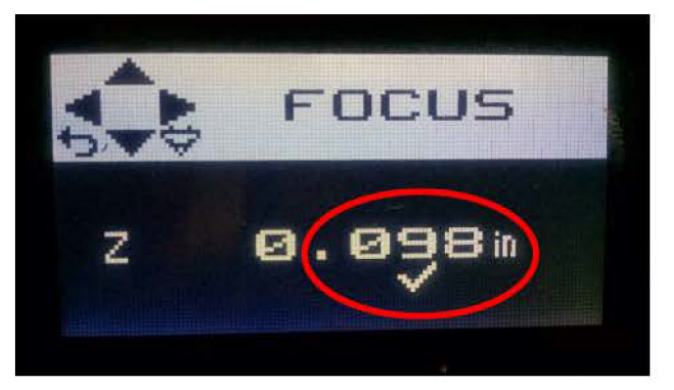 Figure 22: The machine display shows FOCUS and the current Z height.
 -
Run the FileClose the lid of the laser cutter and press the green Play button when ready.
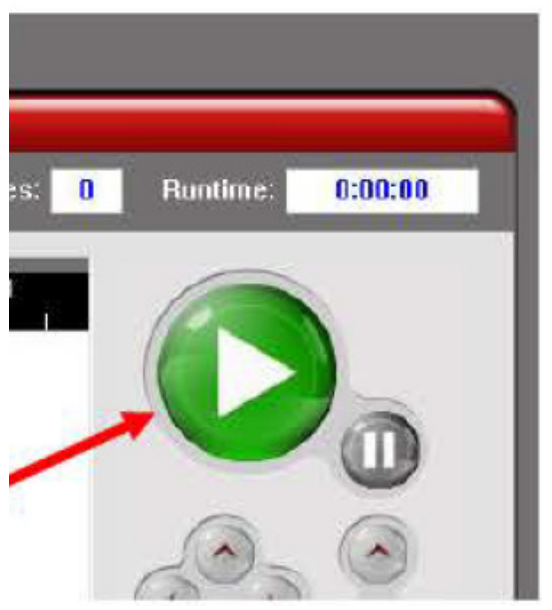 Figure 23: Press the green Play button when ready.
Step 09
Pausing & Tips
You can stop mid-cut to check your work, and a handful of habits will save you material and time. Just make sure that the cutter has stopped and you are also not directly looking into the machine without glasses until it returns back to its homing location.
-
Pausing Mid-CutIf you need to examine your work or clear loose debris or dust from your sheet while the file is cutting, press the Pause button on the machine firmly or use the Pause button in the Laser Control Panel on the computer. It will sometimes take a second or two, but the laser will stop cutting and park in the top right corner. You may now raise the lid of the laser and inspect your work. Take care not to shift the sheet of material you are cutting, or the rest of the file will be misaligned. When ready to finish cutting, close the lid and press the Play button, and the laser will pick up precisely where it left off.
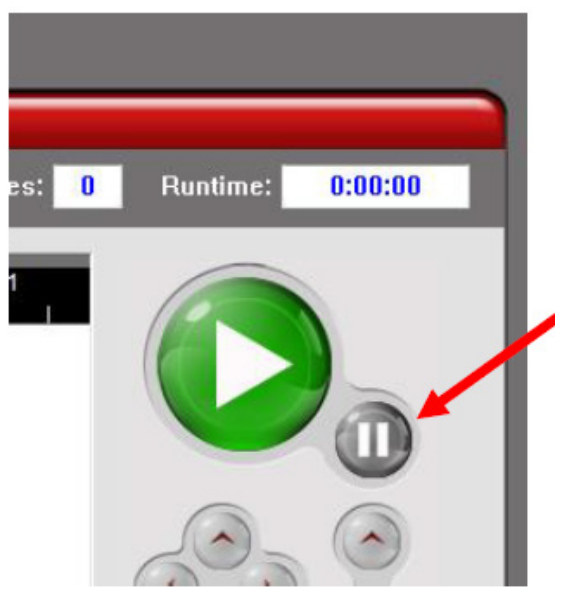 Figure 24: The Pause button in the Laser Control Panel on the computer.
Work Inside-to-the-Outside
Work inside-to-the-outside when planning your cut order. First: All rastering. Second: Vector scoring. Third: Vector interior cuts. Fourth: Vector outside cuts (always cut the part out last).
Misc
Good Habits
-
Have a Monitor Assist YouHave a monitor assist you with focusing the machine and placing your material until you’ve developed competence.
-
Leave the Paper on AcrylicLeave the paper on the bottom side of acrylic to protect it from smoke and scratches.
-
Always Do Test CutsAlways do test cuts on scrap areas of your material to verify settings.
Tips
Quick Reference
-
Nothing Happens When You Send the FileIf you send a file and nothing happens or nothing shows up on the Control Panel screen, check your color mode, check your stroke weight, and check your line colors. This fixes most of students general problems.
-
Score With VectorsDon’t forget that you can score with vectors as well as through-cut. This is usually much faster than scoring with rasters.
-
Organize by Cut OrderRecall that the lasers will always cut all your rasters first, and then all your vectors. Recall also that if you have, say, several vector cuts, the laser will cut them in order of color from black to yellow, just like in your layer color list. Use this to organize your drawing so that you cut your scores first and your through-cuts last. This will help keep you from losing small pieces and snagging your sheet on the nose cone.
-
Leave Yourself Enough TimeRemember to leave yourself enough time to cut your file. Bear in mind that the more complex your design, the lower your speed settings are, or the more rastered artwork you have, the longer you will need to cut your file. It is best to try and bring a file in ahead of time with the proper settings, and load them onto the computer you are using.
-
Split Very Large FilesIf you have a huge file that you know will take a long time to run, such as a sheet with hundreds or thousands of parts, you can divide it into several areas with a margin in between each, and output them as separate files. Doing this will allow you to pull your sheet off the laser while only partially complete and come back to finish your work later without having to throw your material away and start over.
-
Tabs & Bridges for Tiny PiecesIf you have very tiny pieces you worry might blow away or fall through the honeycomb, you can put “tabs” or “bridges” on them: tiny gaps in the outlines of your pieces that leave them connected to your skeleton. In Rhino, trim or split short gaps into the perimeter of each shape in one or two spots. The laser will “see” a gap in your vector. As an added benefit, this allows you to quickly pick up your whole sheet and trim pieces off as you need them at your desk. This works very well for paper and cardstock, which is the biggest offender, but is slightly trickier when cutting acrylic.
-
Make a Test CutIf unsure about your settings, or still becoming comfortable with the laser cutter, make a small test cut either on a part of your sheet you will not need, or on a separate piece of scrap of the same material you’re using for your finished file. Its typically safer to not waste material, "measure twice cut once".